Panopto
Panopto: How to record video lectures
Panopto is the UW’s lecture capture software that allows you to record, edit and review videos on your computer.
This guide covers how you can use Panopto to record and edit video lectures and embed videos in your Canvas course.
For live demos of the steps listed below, please explore our library of Panopto training videos.
To select a different course to record into, click the drop down icon and navigate to the course. Click on the course name to select it.
Recording video
Panopto offers three ways to record video: From your Canvas course (suggested workflow), from the Panopto web site, and using the Panopto desktop app. This guide focuses on all the aspects of recording video and saving the recording to a specific Canvas course.
- Select the “Panopto Recordings” tab from your Canvas course navigation menu.
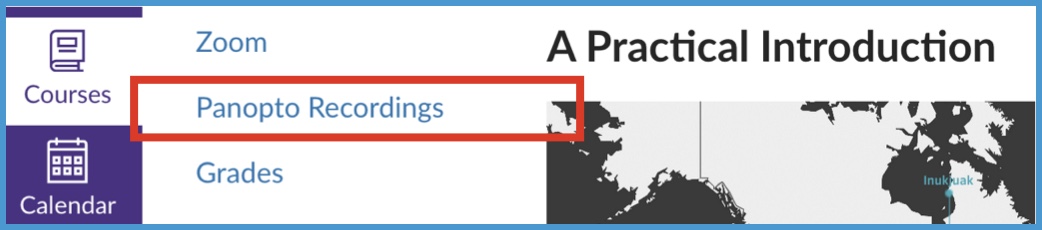
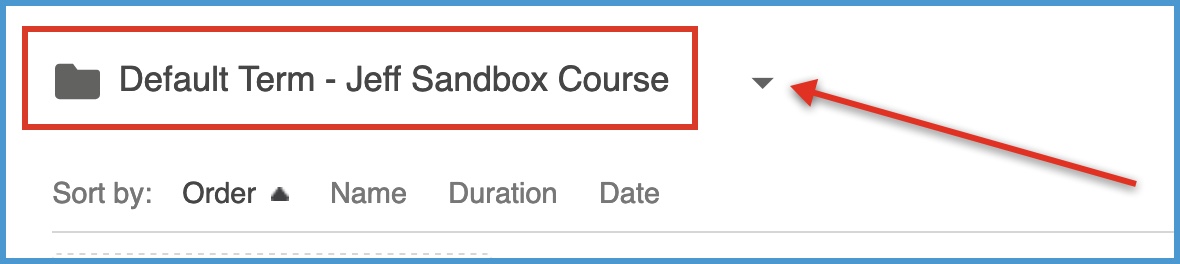
- Check to verify you are recording the video into the correct Canvas course: Find the name of the course near the top of the page. Select the “carrot” to reveal more folders.
- In Panopto Recordings, select the “+ Create” button near the top of the screen.

- From the Create dropdown menu, select “Panopto Capture: Record in browser”

- Accept Panopto’s request to use your computer’s camera and microphone (or choose different audio/video recording devices by clicking on those icons).
- Click the red record button and a 5-second countdown will begin.
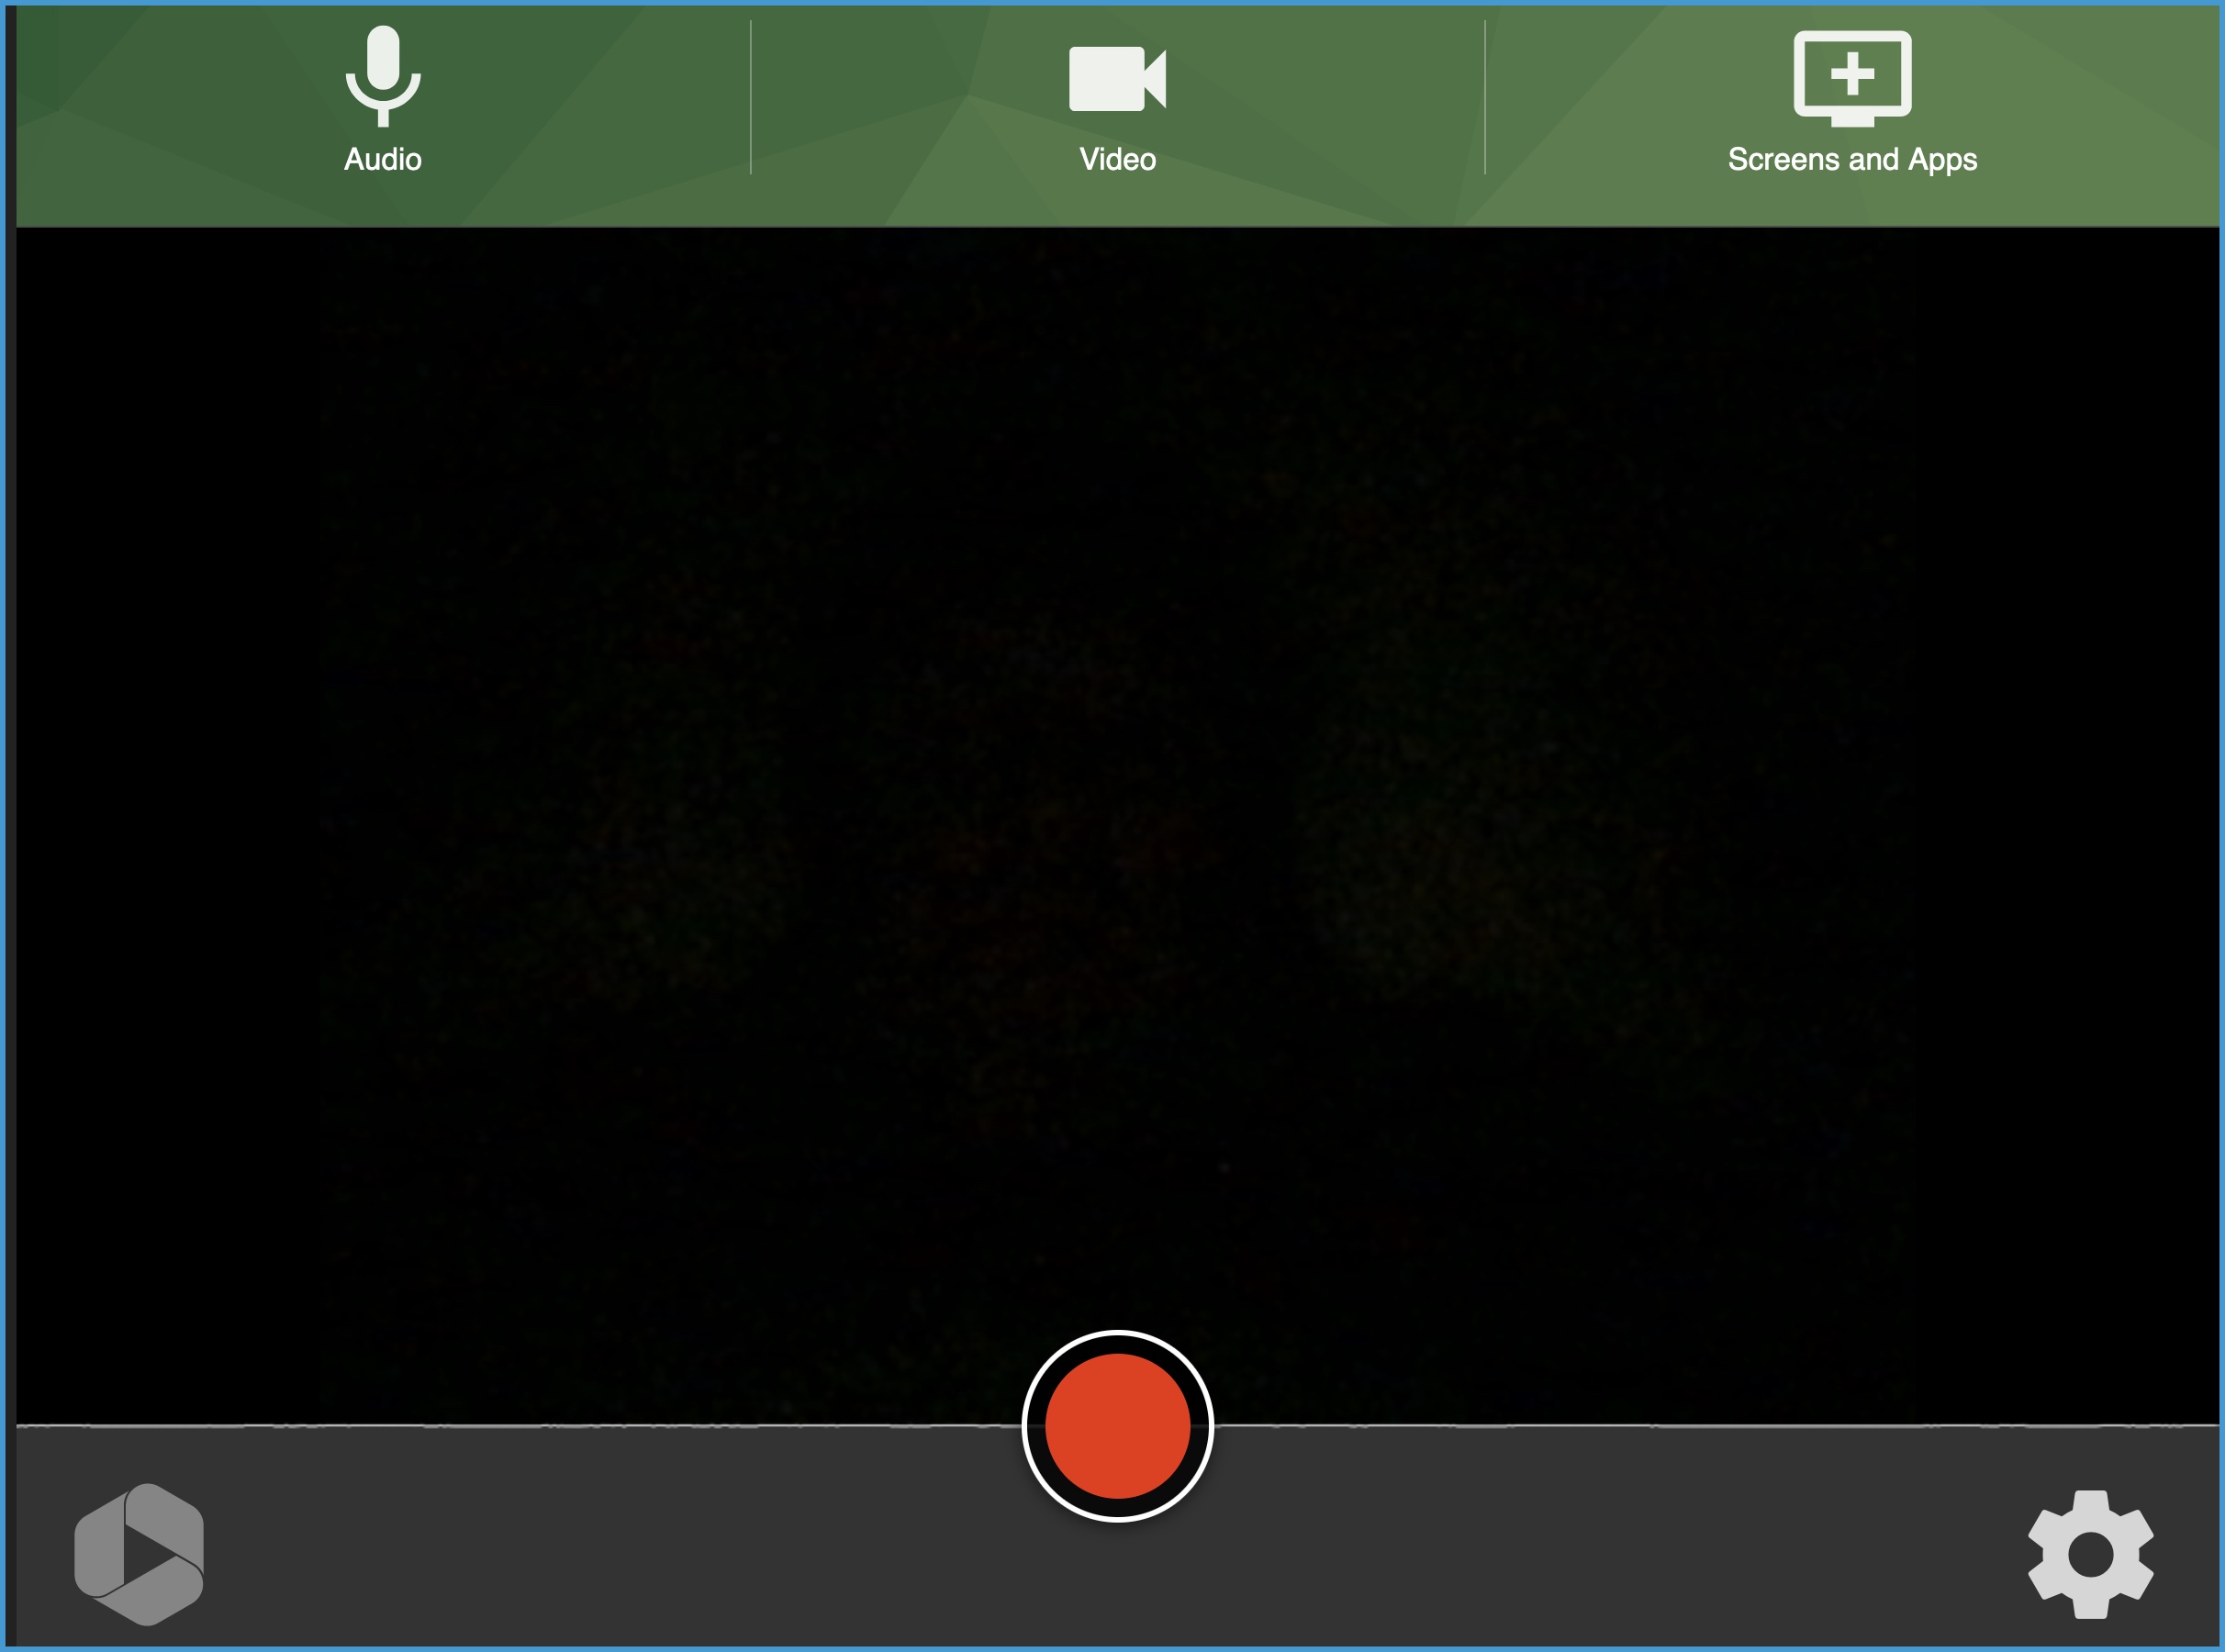
- When you are finished recording, click the red stop button and title the video.
- In the Canvas course, click on the “Panopto Recordings” tab to refresh the folder and view your new video (there may be a delay dependent on the recording length).
Alternative ways to record Panopto videos
We recommend using the suggested workflow above, but below are some additional methods for recording Panopto videos.
Panopto Website
Recording from the UW Panopto Website
- Log into your UW Panopto account.
- Check to verify you are recording the video into the correct Canvas course. If you don’t see your course name, select “Browse” from the navigation tab on the left. Select the course folder for this video to be saved in. The course name will show at the top of the page.
Select “+ Create” in the upper left corner to record.
- From the Create dropdown menu, select “Panopto Capture: Record in browser”
- Accept Panopto’s request to use your computer’s camera and microphone (or choose different audio/video recording devices by clicking on those icons).
- Click the red record button and a 5-second countdown will begin.
- When you are finished recording, click the red stop button and title the video.
- In the Canvas course, click on the “Panopto Recordings” tab to refresh the folder and view your new video (there may be a delay dependent on the recording length).
How to move recordings from one folder to another
If you don’t see a video in a specific Canvas course folder, it may be saved to another folder. Follow these steps to Copy or Move a video to a different folder in your Panopto account.
- From your UW Panopto account, select: “My Folder” in the navigation bar on left.
- Hover your mouse over a video, and click the white checkbox in the upper left corner of the video. You can select multiple videos to move them together in the same action.
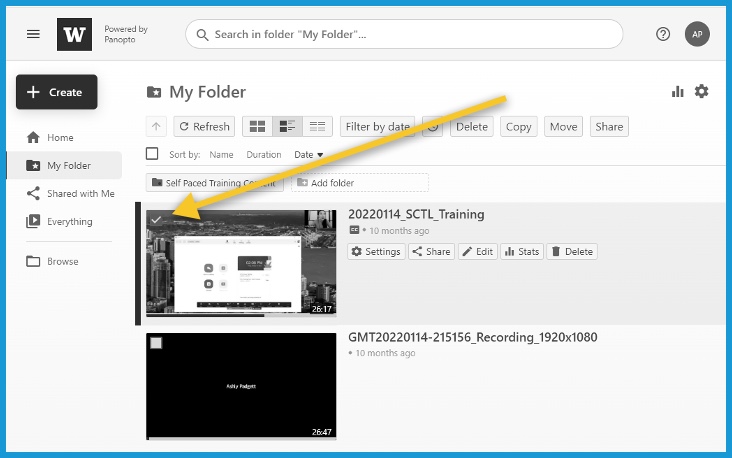
- Once you’ve selected the video(s), click the “Move” button at the top of the page.
You can also “Copy” video(s) to a different folder.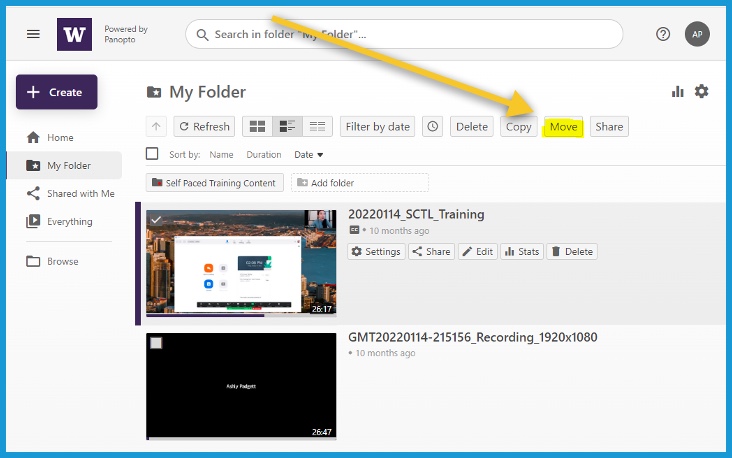
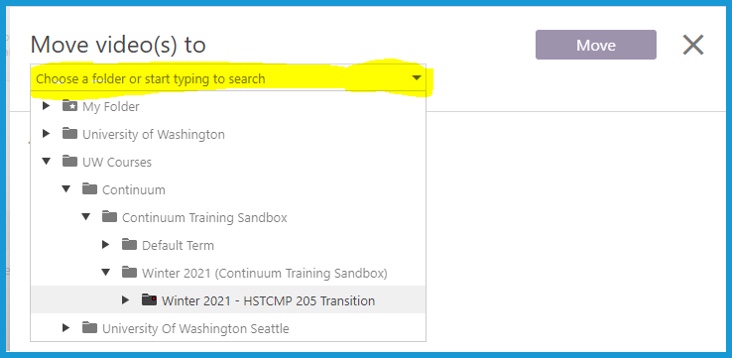
- This will open a dashboard overlay. Under the “Move video(s) to” header, click on the dropdown menu and select the course folder you want to move the video to.
- Once you have selected your specific course folder, click the Move button.
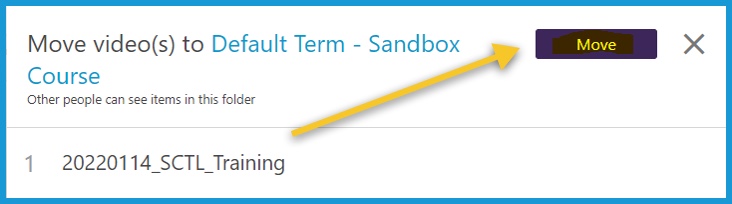
- Exit the dashboard overlay once the Move or Copy action is listed as Done. The video will no longer show in your “My Folder,” and is now saved in the course folder.
Download the Panopto Application
- In your Canvas course menu, select the Panopto Recordings tab
- Select “+ Create” in Panopto.
- From the dropdown menu, select, “Record in application” and “Download Panopto“
- Find the downloaded uw.hosted.panopto file and double click to begin installation.
UW-IT Resources: Install the Panopto Recorder
UW-IT Resources: Create a recording on your computer
Editing with Panopto
Panopto is a non-destructive video editor, so any sections of video you remove from a recording can be added back to the video later.
- In the Panopto Video Recordings folder, hover your mouse over the video you want to edit, and click the “Edit” button to the right of the video.
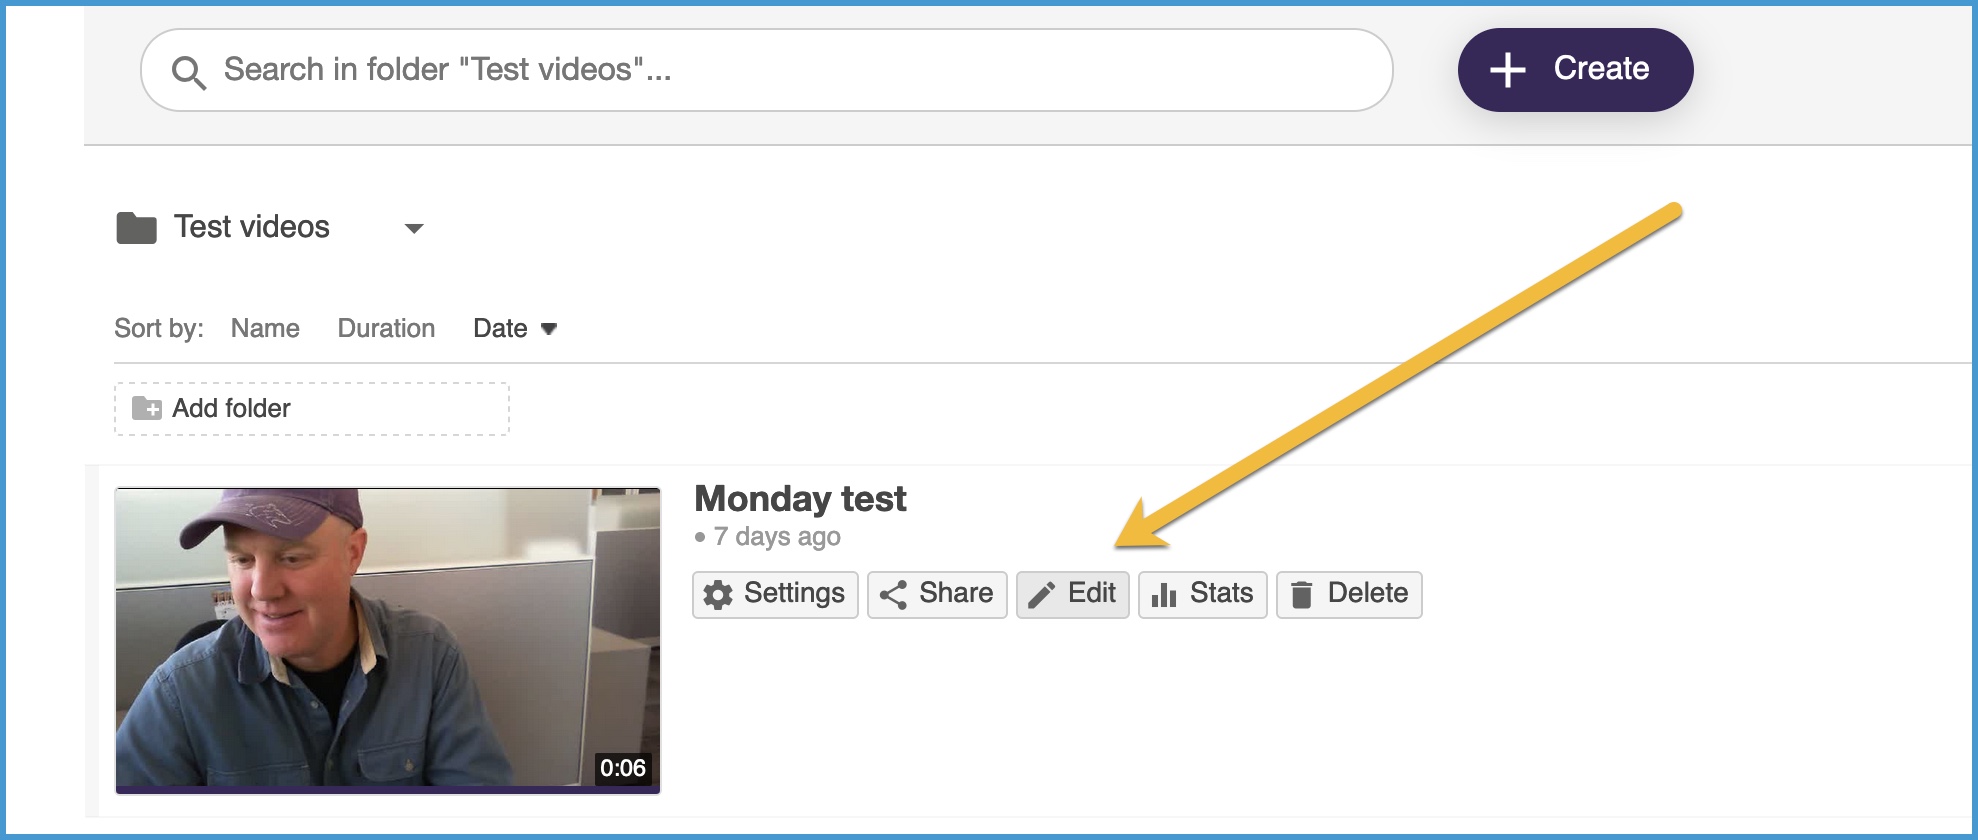
- This action will take you to the editing page.
Trimming sections out
Trim a few seconds, or sections, from the beginning, or end, or middle of the video (for instance, you can trim out sections when students are in breakout rooms, or during a class break.)
- Hover your mouse over the beginning of the video to see a gray vertical bar.
- Click-and-drag the bar to “gray out” a few seconds, or a longer section, you want to trim out.
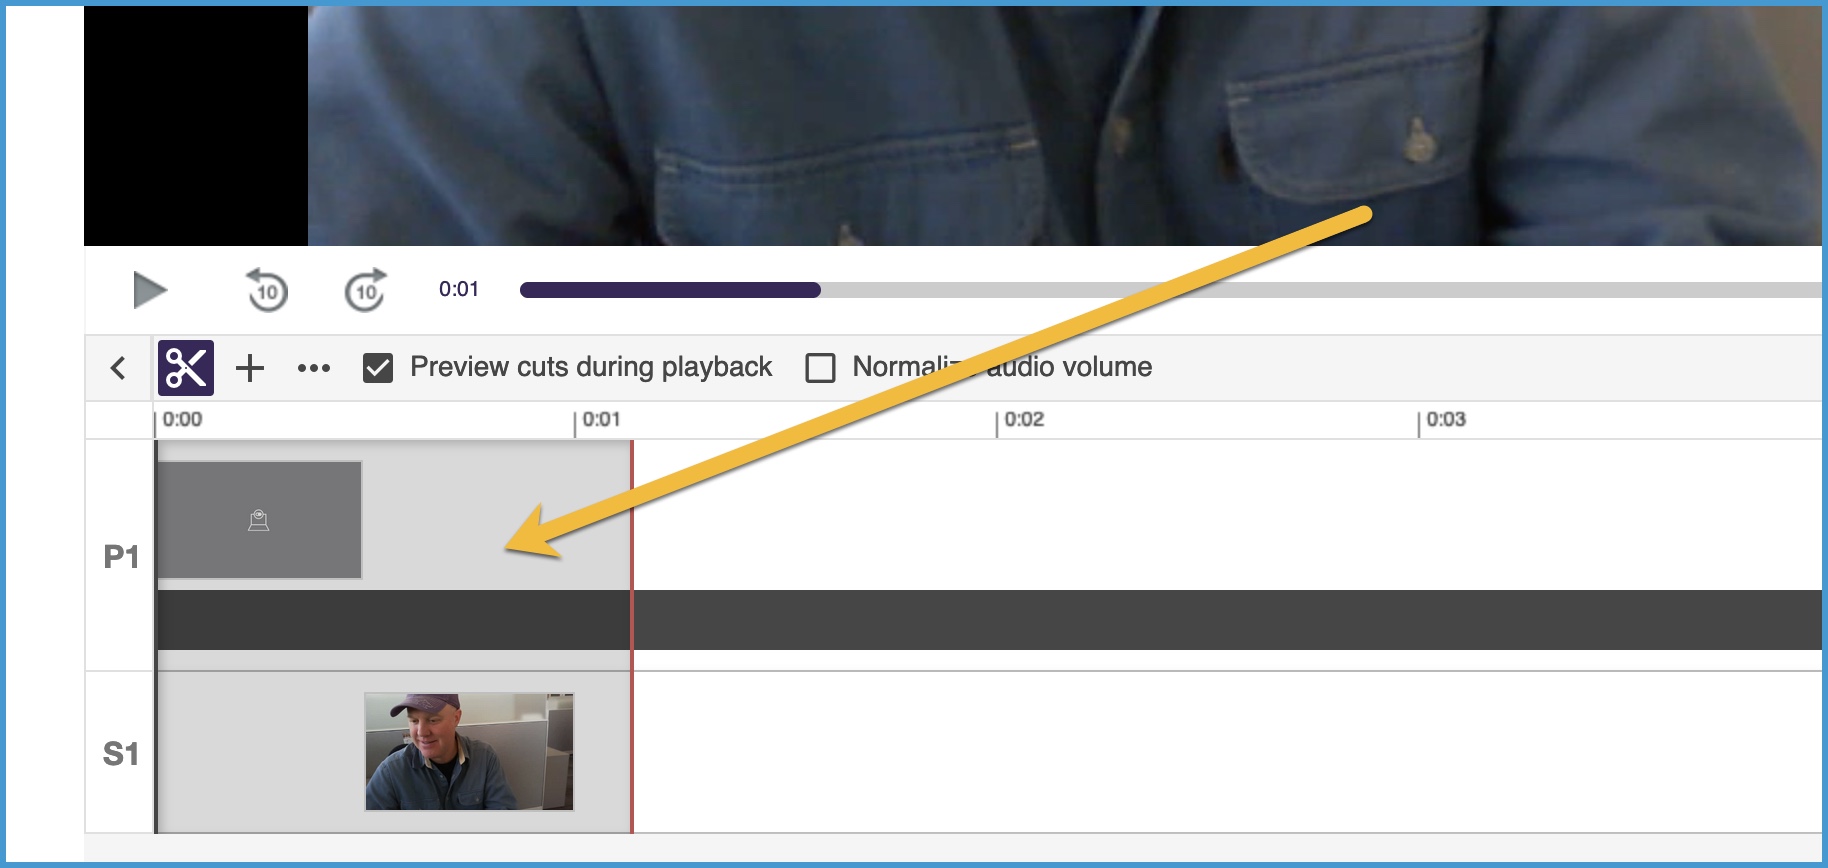
- You can place the mouse cursor anywhere on the video timeline and click-and-drag to cover a section to trim.
- If you need to “reverse” a trim, click on the start or end of the gray “trimmed out” section and drag to the left or right along the timeline.
Trim more precisely
- Click once, anywhere on the timeline, and “place” the red vertical bar. (For instance, at the end of a section you plan to trim out).
- Next, click-and-drag slowly toward the red bar. When the leading edge of the gray section gets close, it will “snap” to the red bar. This helps you create precise trims.
Sections that are “grayed out” on the timeline will not play back to your viewer after you apply changes. To “undo” and return sections back to the video, click-and-drag from the beginning or end of the gray are on the timeline.
Don’t forget to “Apply” your edit changes to this new version of the video!
Panopto Resources: Video on editing in Panopto
Save your changes!
When you are finished editing a video don’t forget to click the “Apply” button in the upper right corner of the editor to save changes.
Edit video captions
Automatic captioning is turned on by default for Panopto videos at the UW. These machine-generated captions will appear after the video is created.
However, automatic captions don’t meet minimum accessibility requirements, so it is important to edit the captions, checking for misspellings and grammar errors.
- From the EDIT page, click on the “Captions” button on the left side of the screen.
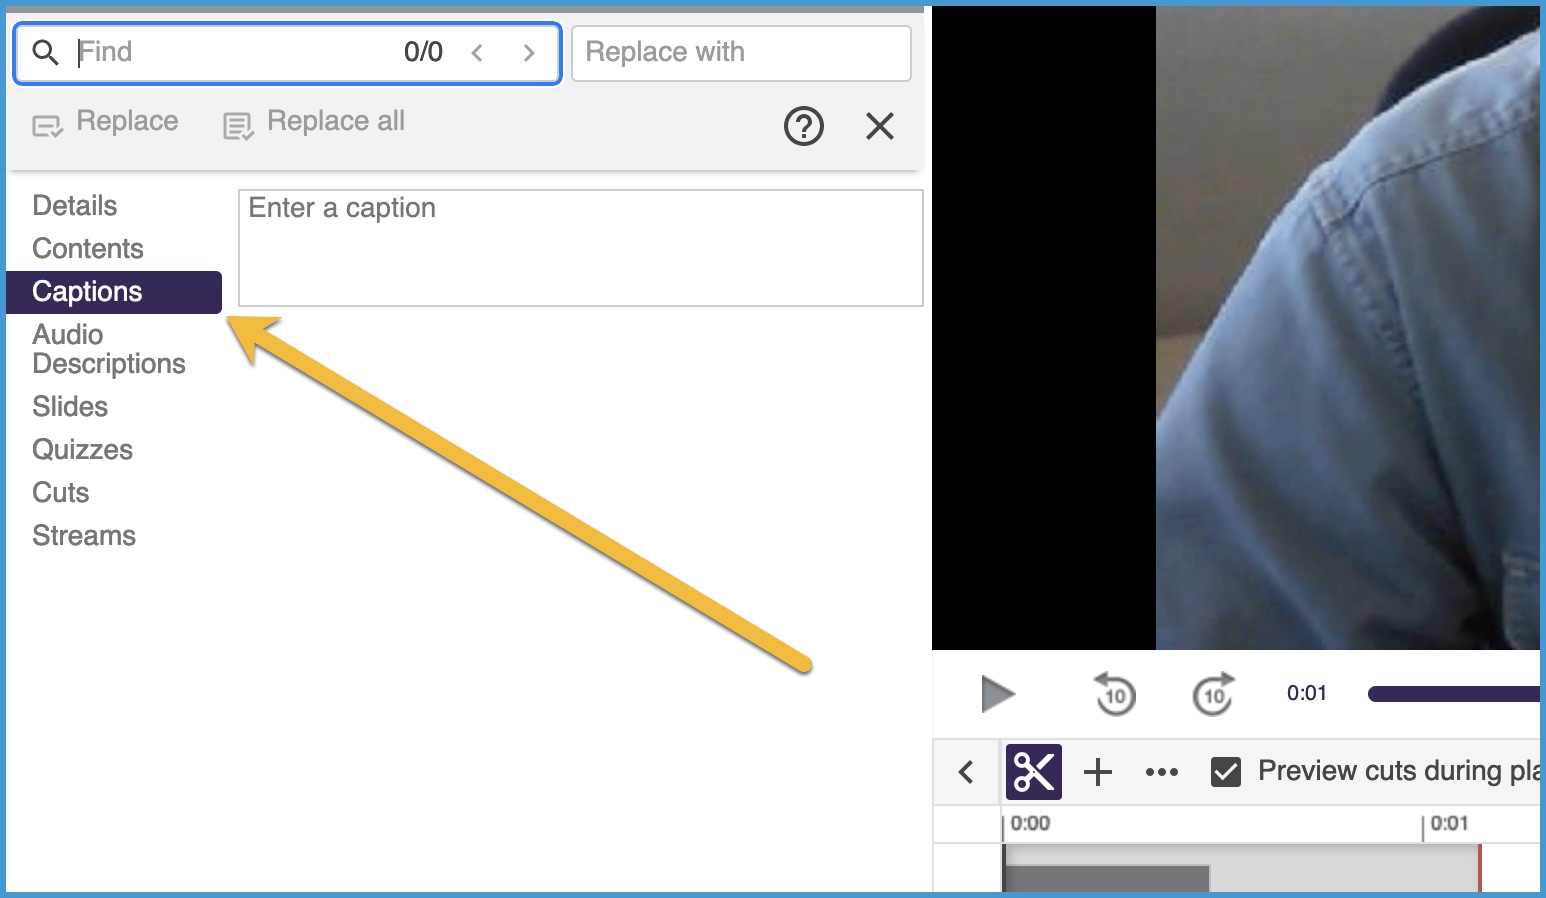
- In the captions interface, click on the caption text to begin editing the text.
- Don’t forget to click the “Apply” button in the upper right corner of the editor to save changes to captions.
Panopto Resources: Guide on editing Panopto captions
Add a Panopto video to a Canvas page
Open a Page inside a Canvas course.
- Select “Edit” (in the top right corner).
- In the Canvas Rich Canvas Editor, locate the plug-in icon dropdown menu, and in the dropdown select “Panopto Recordings.”
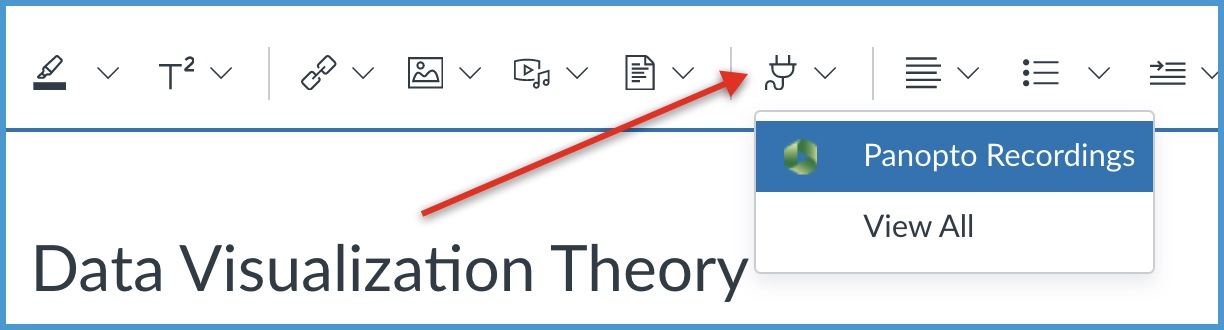
- Select the video you want to embed and click the “Insert” button in the lower right corner.
- The video will be embedded in the Canvas page at the location where the mouse cursor is sitting. Save the Canvas page to apply changes and view the video.
UW-IT Resources: Add a Panopto video to a Canvas page
Updated 01/10/22